
Table of Contents
Do you love stunning nails but don’t have time for salon visits? Are you wondering how to do nail art as a beginner creatively? Fortunately, you can now do your manicure and pedicure at home without professional aid or complex tools.
Whether you want a chic look or some playful elegance, social media beauty trends significantly shape DIY nail art designs. With high-quality nail paint, toothpicks, bobby pins, and some patience, you can make a bold fashion statement through DIY nail art.
We’ve compiled 5 easiest nail art designs that you can effortlessly achieve using random household items-even as a beginner.
Benefits of DIY Nail Art for beginners?
Did you know there are over 395,600 nail technicians worldwide? While the techs do a good job styling nails, Simple DIY nail art is more preferable option for beginners seeking to boost skills and confidence at home. Starting with basic designs helps you master the skill gradually before progressing to intricate patterns.
So, here’s why DIY nail art is great for beginners:
- Accessible tools: With DIY designs, you can use readily-available items. You don’t need expensive nail care tools and professional skills to make beautiful nail art patterns during your home Mani-Pedi routines. For instance, a toothpick from your kitchen can create stunning polka dots on your nail paint.
- DIY nail art is not time-consuming: Most DIY nail art styles are simple and provide quick results. They don’t require you to follow long processes, making them a great solution to enhance your overall look in minutes.
- Versatility: Unlike salon styles, nail art DIY allows flexibility and customization. You can play around with your creativity to create styles that suit your unique preferences, mood, personality, outfit, and occasion. Also, you can blend bold and cool colors for a unique outcome.
- DIYs are less overwhelming: Beginner-friendly nail art designs are basic, adjustable, and easy to achieve. Unlike complex patterns, they leave room for practice and improvement. If you don’t like the outcome, it’s easier to undo and correct simple nail art.
Top 5 Easy Designs for Beginners
There are hundreds, if not thousands of nail art tutorials across the internet. While they target people with low skill levels and an artistic mind, choosing the simplest designs to emulate at home can be overwhelming.
First, gather simple tools, including:
- Scotch tapes
- Bobby pins
- Toothpicks
- Quality nail paints
Once everything is ready, try these easy yet decorative DIY nail art ideas to revamp your look.
1. Dotted Nails style (Dotticure)
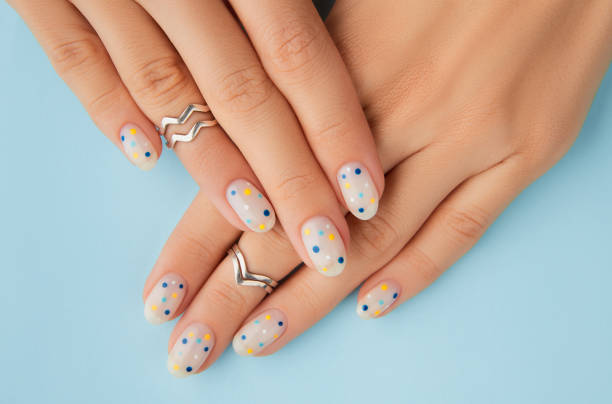
If you want a blend of simplicity, elegance, and playfulness, polka dots are a timeless option you can try. For a Dotticure, you’ll require a dotting tool such as bobby pins and tailor’s pins to create varying sizes of polka dot clusters.
Here are the steps to follow for an eye-catching dotted DIY nail art style:
Step 1: Applying Base Coat
Apply a base coat with solid colors like white or bold pink. Allow it to dry well. Well-dried nail polish is healthier because it can’t pollute the air or be absorbed into your body.
Step 2: Put the Color
Put the beaded end of a bobby pin, paintbrush tips, or toothpick in a visually contrasting, bright color, such as deep blue, purple, or black. Bobby pins are ideal for smaller dots, while the tip of an old paintbrush creates real, sizeable polkas.
Step 3: Create the Polka Dots
Dab the color-coated dotting tool on your dry nail paint to create random polka dots. You may also put the dots in patterned clusters / or just spread the dots randomly. For professionally-looking results, consider varying the color shades and dot sizes.
Step 4: Apply Top Coat
Once it dries, apply a top coat to secure your dots and give your work the polished, salon-like seal. Wait until everything dries well before showing off the beautiful polka dotties to your friends.
2. Delicate floral patterns
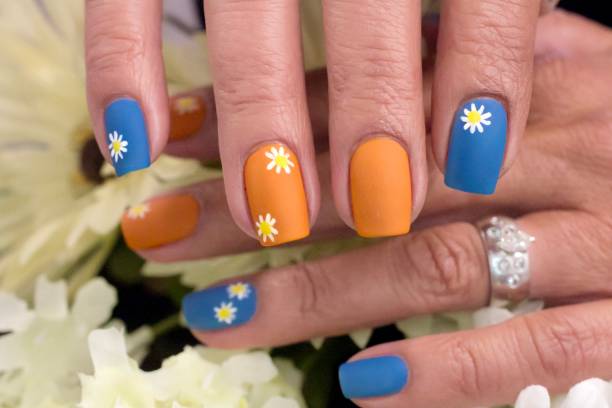
Bring nature’s floral beauty to your hands with this easy DIY nail art design. It involves creatively painting flower patterns on your nails to achieve a girlish, feminine look that radiates summer goodness.
Step 1: Apply a Base Coat
Start by applying a soft, neutral base coat color to create the ideal background. Colors like sky blue or pink make your flowers pop.
Step 2: Create Flower Center
Put a dot as your flower’s center using your preferred dotting tool. A contrasting color works best.
Step 3: Add Cluster Dots
Add tiny dots in clusters around the center dot. Use a toothpick or super-thin brush and drag the dots outward to create beautiful petals. Choose your dots’ colors depending on your flower type. For instance, you’ll put yellow dots to make sunflower petals.
Step 4: Add Top Coating
Wait for the flower to dry. Add a high-quality top coat to make your pattern durable.
3. Stripes/Striped Designs
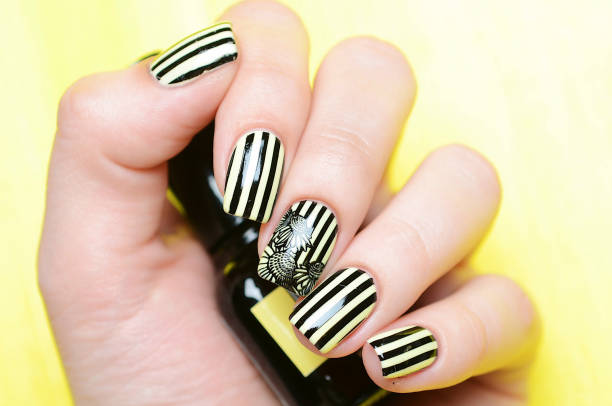
Striped nail art designs are versatile and the easiest to create. With a cellophane or scotch tape and your favorite nail polish colors, you can transform your nail game in minutes! Also, a thin brush is handy when creating artistic horizontal, zigzag, or vertical lines on your nails.
Here’s how:
Step 1: Apply Base Coat
Apply a preferable base coat. A nude color, baby blue or pastel pink, works best. Let the coat dry.
Step 2: Put Thin Tape Strips
Depending on whether you want vertical or horizontal stripes, put thin tape strips over the base coat.
Step 3: Apply Contrasting Nail Polish
Choose a contrasting nail polish color and paint it over the tape. For instance, if the background color is black, try painting white. Wait for it to dry, but not too dry.
Step 4: Remove the Tape Strips
Gently remove the tape. Ensure the paint isn’t too dry for an elaborate pattern. The tape keeps your lines straight and is ideal for creating geometrical shapes.
Step 5: Add a Top Coat
Seal your DIY style with a topcoat for a perfect finish.
4. The Rainbow Skittles (Random rainbow)
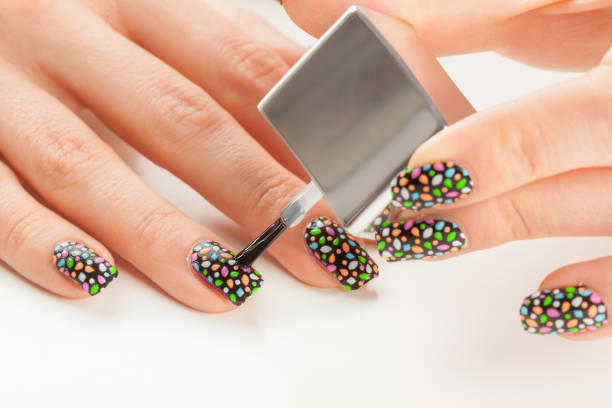
This simple DIY nail art design delivers a unique pop of rainbow colors. Here, you pick random nail paint colors and apply a different one on your fingers. This color combination results in super-cute, beautifully mismatched, and multicolored nails.
Step–by–step tutorial:
Step 1: Get Different Colors
Gather at least five nail paints of different colors.
Step 2: Apply a Thin Base Coat
Next, apply a thin base coat. Give it time to dry.
Step 3: Apply Different Colors
Apply a thin coat of a different color on each finger. Once dry, add another thin coat to every finger. Applying two thin coats instead of one thick coat makes your nail polish dry faster.
Step 4: Seal the Coat
Lastly, seal with a colorless top coat for durability.
5. Classic French Manicure
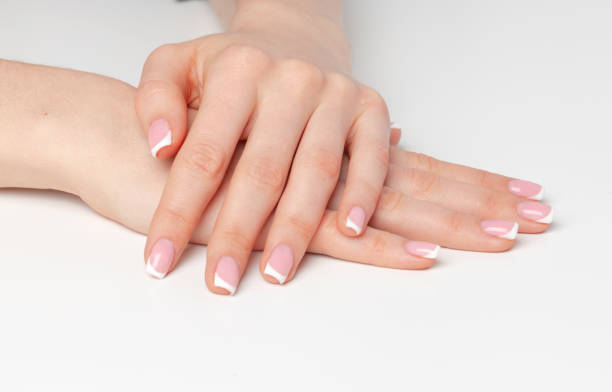
While it may look sophisticated, the classic French manicure is one of the most straightforward nail art DIYs for beginners. It involves painting your nail base one color and adding another shade for the tips. So far, white is the most popular color for French manicured tips but don’t be shy about trying other colors.
Step-by-step tutorial:
Step 1: Apply a Base Coat
Paint your nails with a base coat for nail protection. Allow it to dry.
Step 2: Cover the Nail Base
Cover your nail’s lower part using cellophane tape. Don’t touch the tips.
Step 3: Apply Polish on the Nail Tip
Apply white nail polish on your exposed nail ends. Carefully remove the tape and let the polish dry.
Step 4: Add the Top Coat
Once dry, seal with a layer of top coat for an extra shine.
Ready for DIY Nail Art?
The convenience of home manicures and pedicures is unmatched. With loads of inspiration from social media and beauty websites, DIY nail art is becoming a viable option for many because anyone can achieve it without prior nail styling experience.
You only need patience, perseverance, nail polish, and simple household tools to turn your nails from boring to stunning without leaving your home. Whether you want to change your look or are planning an upcoming Instagram personal branding photoshoot, our detailed list of easy DIY nail art designs for beginners will sort you.